Inspiration & Recipes
CAMP ACTIVITY: CLAY COASTERS
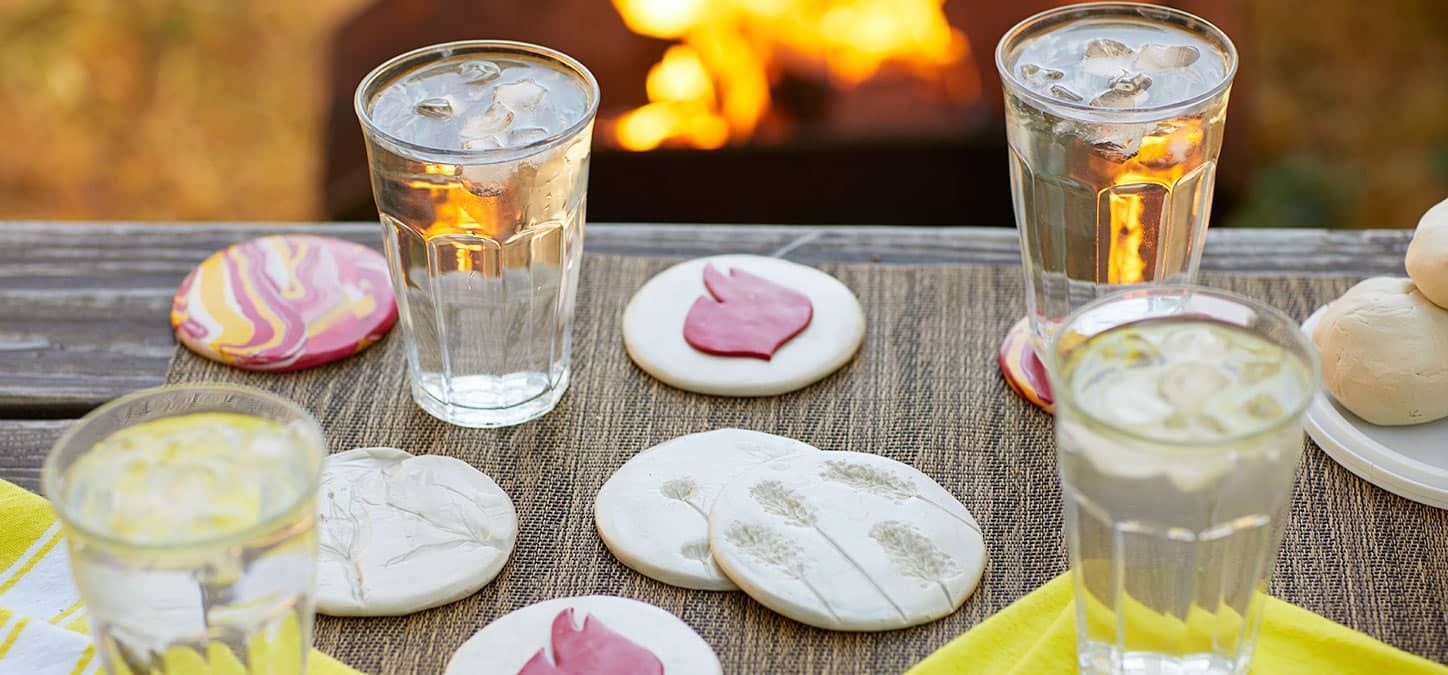
Make an impression—literally! Show off your creative side and protect that patio table at the same time. Get your hands (a little) dirty, roll up your sleeves, roll out some clay and create a set of DIY coasters for your next fireside happy hour.

You’ll need:
- Polymer clay (such as Sculpey)
- Mod Podge
- Flowers
- A rolling pin
- Parchment paper
- A cookie sheet
How-To:
Stock up at the craft store! Polymer clay is affordable and comes in every color you can imagine. Grab whatever colors inspire you. We used white, red and yellow. Grab a jar of Mod Podge while you’re there—it’ll form a protective layer on your finished product.
Pick some flowers! Search for sturdy blooms with interesting textures. No flowerbed? No problem! Pick up a bouquet at the market. Alternatively, use rocks, beads or rubber stamps to make impressions.
Preheat your oven to 275 degrees and prepare a cookie sheet with parchment paper.
Roll a piece of clay into a ball and use a rolling pin to flatten it into the appropriate size and shape.
For a marble effect, make long ropes with different colors and then roll those ropes into a ball. Flatten with a rolling pin to reveal the pattern!
For cut-outs, use a butter knife or dull pencil to cut out the shape of your choosing.
For coasters with impressions, place the flowers or other objects firmly into a rolled-out piece of clay, and remove carefully, making sure no petals get left behind.
Bake for 20 minutes on the cookie sheet and let cool completely.
Once cool, paint each coaster with a layer of Mod Podge and leave out to dry overnight.


